Well, I promised a cupcake stand tutorial so here it is. :) These are easy to make that I feel silly even posting a tutorial for it!!!
OK, here goes...
Get yourself a wooden candle stick and paint it whatever color your heart desires. They come in all different heights. I found mine in the unfinished wood section at Hobby Lobby.
Then get a round platter. Again, I found this one at Hobby Lobby. Also, in the wood section they sell all different size wood rounds if you wanted to go w/ painted wood as your top.
For this stand I used a little porcelain platter and thread some ribbon through the holes around the edge. This one is a little different than the others I made. I love this top b/c you can switch out the ribbon to coordinate with whatever colors/theme you're using. :)
Grab some glue....
Apply glue to the top of the candle stick...
Flip the platter over and stick the candle stick to the back. Make sure to center the candle stick in the center of the round top.
Let the glue dry and VOILA!! You have yourself a cute little cupcake stand. :)

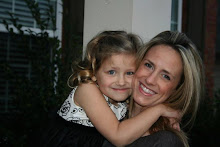
I want to give a special thanks to my assistant apprentice, 4 year old Bailey Marie Petronis, who made the adorable cupcake featured on today's cupcake stand. Thank you sweet baby.
Together, one day you and I are going to do big things!!! ;)
Sooooooo, DA DA DA DA, along with this tutorial I would like to announce a GIVEAWAY!!! I will be giving away a cupcake stand to one lucky reader of my blog, you choose which style!! :)
All you have to do is leave a comment on this post with your favorite cupcake stand photographed below. You have until the day I turn 29 to leave a comment...
(that day is also known as Monday July 26, 2010). :)
I will be randomly choosing the winner on my birthday. Good luck!!! :)


These little stands are sooooo cute and Bailey is quite the little cupcake decorator!!!! I want one!
ReplyDeleteThese stands are adorable! Although, I MIGHT be able to make one with your wonderful tutorial I would like to win one instead! :) My favorite one is the pink with the black dots! So cute!!!
ReplyDeleteHappy Birthday
Kimmie (Burkett) Heglin
I like them all, but I want the cupcake!!!
ReplyDeleteI fell in love with these the first time you posted them!! They are too cute! I would love to win the pink and black polka dot one!! Happy Early Birthday to you!!! =)
ReplyDeleteThat pink and black polka dot one would match Ella Beth's Minnie Mouse party perfectly!;) Your creativity is just amazing, and it's so evident that Bailey has also been blessed with your talent!
ReplyDeleteHow cute! I'd love the one with polka dots on top!
ReplyDeleteI was actually going to post a comment today before I read abt your giveaway. I was going to tell you how much I LOVE your blog and how much it makes me smile and happy! :) You are SO talented- truly.
ReplyDeleteBut since you are doing the giveaway, I absolutely LOVE the cream one with the brown and cream checkered ribbon! TOO cute!
Hey Kate! You know in my house of all boys I like the one with the brown ribbon black/brown stand. Super cute! Great idea with the giveaway... maybe I should do one on the monogram blog :)
ReplyDeleteThis comment has been removed by the author.
ReplyDeleteI love all of them but especially love the black one or the off white one, the off white you could switch the ribbons out for the different occasions! Thanks for sharing how you did it, this will be super cute for my son's upcoming birthday!!
ReplyDeleteWhat a great tutorial! They are all adorable, but I especially love the one you used in this post!
ReplyDeleteOH MY! how do I choose a fav? great tutorial, may have to do this one with the kiddos next week! I love the one that you can switch out the ribbons on, (AND the pink one with black polka dots for my daughter AND the superman one for my son!) thank you for sharing!
ReplyDeletejenn post
noblekatt(at)hotmail(dot)com
ps, found you via your post on frost me!
These are so cute I like the pink with black polka dots. Great tutorial I'm gonna have to try making some. Thanks for sharing. I hope you have a great Birthday!
ReplyDeletehttp://ikolinda-scrappinmomma.blogspot.com
or
iko.linda@yahoo.com
Cute tutorial! Hm... lovin all of them, but the one you made through the tutorial is my fave. The 'masculine' one is cute too!
ReplyDeletele.paradis.found at gmail dot com
I start my days off by checking your BLOG. I find it very entertaining. I never know what to expect...and the love for your family just oozes between the lines. I'm not posting to win a cupcake stand...just to let you know that I enjoy my morning visits into your home. I am amazed by your creativity! Keep up the good work.
ReplyDeleteha ha :) super cute super man!
ReplyDeleteHey Kate,
ReplyDeleteExcited about your give away....how nice is that! I love the cream stand with the plate and ribbon.....cream color goes with anything and then changing out the ribbon would be so helpful in different events. Love what you do and I tell people about your cakes and fun treats all the time. I am so impressed and wish I had the creativity. DOn't give it up!
Sarah (Bodie) Schmeelk
I like the tallest of the cupcake stands, the one you used in the tutorial with the changeable ribbon. Very cute items.
ReplyDeleteJoann Temple
templejg@verizonl.net
I like the brown one with the cream colored top. I have absolutely loved all the cakes you make, they give me so many ideas! You are amazingly talented.
ReplyDeleteThey are all so cute! I'm only writing to tell you how adorable they are, not because I want to win one. The cupcakes I make are not worthy to be put on a stand. :)
ReplyDeleteI just came upon your site!!! I LOVE it and you are very talented!!! Thanks for the ideas to try out :)
ReplyDeleteWelcome to Lotusbhai – your trusted hub for online cricket ID services. Enjoy live sports, instant updates, and secure wagering. Sign up now for fast payouts and 24/7 support.
ReplyDelete